Tuesday, April 19, 2011

2011.04.14 - Roasted Vegetable "Enchiladas", Mexican Chocolate Cookies

I am a teeny bit obsessed with Pinterest.  It is a site that collates all of these pictures that you find and clip across the web and shows you what other people are pinning, which you can then "repin" to your own board.  I love it for making inspiration boards and gathering pictures of things I love.  I still use Delicious for my recipe storage since that's more of a searchable list interface, but Pinterest is great for tagging lovely cake designs, home ideas, and wedding ideas.

I was browsing Pinterest early last week, and saw this gorgeous picture of something called a "roasted vegetable enchilada".  I knew I had to make it for Thursday Dinner.  Have I ever turned down a roasted vegetable?

Since I was going with a "Mexican" dish, I decided to go with simple Mexican Chocolate cookies for dessert.

Roasted Vegetable Enchiladas

This was great!  It really has nothing to do with enchiladas, more like a Mexican casserole.  The vegetables all went really well together (who knew cauliflower would work well in this?)  Everyone loved it and it is fairly simple to put together.  I was going to add black beans into the dish, but forgot, so I just served them on the side and mixed it all up together on my plate.

K also brought some pulled pork, which was delicious and went really well with the dish!

Modifications: I left out the poblanos (no spice for me!) and increased the amount of cauliflower, corn, and spinach.  I used a 9"x13" pan instead of 9x9 and still found that I only had room for 2 layers instead of 3.  I also omitted cilantro (ew).  I used Trader Joe's pico de gallo, and found it to not be too spicy, even though it had jalapenos in it. 

Mexican Chocolate Icebox Cookies

These were nice and chocolate-y with a nice spice flavor.  I love mexican chocolate most things, as long as I take it easy on the cayenne.  Although they aren't the most attractive cookies while making them, slicing and baking right out of the freezer is awesome.  I still have half a batch left in there!

Tuesday, April 12, 2011

2011.04.07 - Baked Brie, Broccoli Soup, Cake Pops


What to do with a ton of leftover brie?  First world problems, people.  I chose to serve it baked and oozy with a healthy broccoli soup to balance it out and a special dessert.

D recently finished her thesis defense, earning her the title of Doctor (PhD variety) in Physics.  Celebrating the culmination of over six years of work (and not blowing anything up with electromagnets or particle accelerators the whole time!) deserves a special dessert, at the very least.  I wanted to play with the theme of the atom, so it seemed like a good time to try my hand at cake pops.

Baked Brie with bread

Typical baked brie wrapped in puff pastry can be pretty great, but I felt like something a little "lighter".  This recipe calls for just baking the brie as is, and topping it with some honey and almonds.  It was great paired with Trader Joe's Rustic Rosemary Bread (a new favorite!).

Broccoli Soup

I've made this soup from Molly before, and I love it.  It is not at all heavy, it is better than the sum of its parts (even non vegetable lovers like this soup), and it seems pretty much healthy (as long as you take it easy on the sour cream topping).

Modifications: Left out all garlic, per usual (allergies).  I forgot to add the grated parmesan to the sour cream mixture, but we all survived :)

Red Velvet Cake Pops

Unless you've been living in a cave, you probably haven't been able to avoid cake pops on the internet or in the world.  I hear they sell them at Starbucks now!  I hadn't made some before, but I had a can of cream cheese frosting in the pantry, so I thought red velvet cake pops would be perfect for my atomic structure. 

Per cake pop tradition, I used a box red velvet cake mix.  Which tasted oddly like ... nothing ... after I baked it.  The least flavorful boxed cake I've ever had.  I knew that I'd be combining the sucker with a whole container of frosting, so I didn't worry about it too much.  The cake pop making process was messy (I used my hands!  they were dyed red!) but not too difficult.  I didn't quite have the patience to make them perfectly smooth, round, and even sized, so mine were pretty remedial looking.  One of the big downsides of my side-by-side refrigerator is that it is hard to freeze a batch of cake pops all at the same time, because I can't just stick a half sheet pan in there :( 

The dipping process went pretty smoothly, although I must emphasize instructions that I vaguely recall reading in Bakerella's book -- make sure that the pop is *completely* covered by the candy melt coating.  I had a few that had tiny holes and sure enough the cake pop mixture extruded out of the holes, for lack of a better word.  I chose chocolate for my neutrons, green for my protons, and purple for my electrons.

I arranged the pops in a loose atomic structure, paying no attention to proper balance, and used some thin silver thread to join the electrons together in their valence levels.  D said that the structure would be more appropriate for a neutron (also the subject of her thesis), so imagine they are instead quarks, some top, bottom, charmed, spin, whatevers :)

I find cake pops to be unbearably sweet (but still completely addictive).  I'd love to make a version with a more subtle frosting and a good homemade cake.  Most common reaction from people trying a cake pop for the first time: skeptical look, tentative bite, then "oh!" then "YUM!" then "how is this so moist?"  It's kind of hilarious.

Monday, April 4, 2011

2011.03.31 - Chicken Paprikash, Buttermilk Ice Cream, Flourless Fudge Cookies

Somehow, not a single picture from this dinner.  Oops!

Leftover buttermilk and the need for a gluten free dessert let to an amazingly delicious ice cream and cookies combination this week.  I had been seeing chicken paprikash recipes pop up here and there, so I had it stuck in my head as something I wanted to make.

Chicken Paprikash with asparagus and mashed potatoes

The paprikash was good, but I wasn't crazy about it.  I think I just don't like the taste of paprika that much.  I served it with mashed potatoes, but I accidentally boiled the potatoes far too much, so it was more like mushed potatoes.  Yuck.  I steamed the asparagus following these neat instructions, and then served with a squeeze of lemon juice.

Modifications: Since I was cooking for eight people, I modified this recipe to work a bit better with what chicken pieces were on sale and how many pans I wanted to dirty.  Chicken "hindquarter" was on sale, but they were way too large to fit in a pan, plus they would have taken forever to cook on the stovetop.  I roasted the hindquarters in the oven with some olive oil, salt, pepper, and paprika, and then picked the meat off after they were done and cooled.  I then cooked the recipe as instructed with some chicken thigh pieces and added in the roasted chicken meat at the end to warm up in the sauce.  I also omitted hot paprika/cayenne, since I don't like spicy food.

Gripes: Note to self, don't get caught up reading something on the internet while boiling potatoes.  Before you know it, they will be overcooked!

Buttermilk Ice Cream with Flourless Fudge Cookies

These cookies were fascinating to me, and also highly addictive.  Instead of using gluten free flours, these cookies just didn't use flour at all.  The dry ingredients were just confectioner's sugar, cocoa powder, and the usual leveners, and I suppose the structure was created via the egg whites.  They were chewy, crackle-y, and really chocolate-y.  I thought they went very well with the tang of the buttermilk ice cream, which I may prefer to vanilla! 

Modifications: As Deb discusses in the ice cream recipe, it calls for a ridiculous 12 egg yolks.  She said that you can get by with 6, so that's what I did.  The original version would go great with making an angel food cake, since that uses 12 egg whites!

Thursday, March 24, 2011

2011.03.23 - Root Vegetable Pie, Peppermint Patty Brownies


In a rare departure, this week's dinner was on Wednesday!  The original dinner day was Wednesday before being moved to Thursdays many years ago, so there's precedent :)

I had a ton of cheese left over from the St. Patrick's day extravaganza, so somehow this menu sprung from that (the inner workings of the mind baffle).  We started with cheese and crackers, which I dressed up with some almonds and dried figs.  I used my awesome soup and sandwich bowls as the cheese and cracker trays - an application that I thought turned out well.

The root vegetable pie recipe came from the blog of Baking For Good, an online baked goods shop that donates 15% of sales revenue to charity.  The owner, Emily, is the cousin of a close college friend and a great person.  I admire her for leaving the world of consulting to follow her passions and do good!  I haven't bought from her yet (because I love baking so much myself!), but have definitely been meaning to.  I recommend checking it out if you don't like to bake but want some yummy goodies, or if you want a LOT of yummy goodies (BFG does specialty orders for things like baby showers and weddings).

Root Vegetable Pie with Rosemary Crust, with crust adapted from Jeanne's gluten free pie crust

I love root vegetables and loved the sound of a rosemary crust, so I've been itching for an opportunity to try this out.  I thought that the combination of butternut squash, sweet potato, and beets was a great one.  This is favorite dish involving beets thus far because I felt the "earthy" taste of the beets was properly muted.  The rosemary crust was delicious, and not at all greasy, which is a complaint I have with most pie crusts.  This pie was delicious and is definitely going to become a go-to winter brunch recipe for me.

Modifications: Omitted the mushrooms and ricotta topping.  I swapped the crust for a gluten free pie crust based on Jeanne's recipe.  I halved Jeanne's recipe (since I only needed a bottom crust), used 1/2 tsp. of salt, omitted the sugar, and added about two teaspoons of chopped rosemary.

Gripes: I thought as I was making it that the amount of milk and egg filling sounded suspiciously small for the size of the pie.  I found this to be the case after baking -- the egg part was almost unnoticeable.  The pie could have used more binding, so next time I would increase the egg and milk mixture - doubling or even tripling it.  I think it is a fine line because I wouldn't want this to tip over into the world of quiche -- I liked that the root veggies had an individual texture instead of being suspended in egg.  More experimentation necessary.

My hands got super red while peeling and chopping the uncooked beets!  Next time, I will roast them separately in their skin (easier peeling and chopping afterward), or buy them pre-prepared :)

Peppermint Patty Brownies

I had peppermint patties left over from last week's Shamrock Shakes, so I decided to get rid of them in brownie form instead of eating them all myself.  This brownies were nothing special, I wouldn't make them again.

Modifications: I used 10 regular size peppermint patties instead of the mini ones mentioned in the recipe, and probably could have used 12.  I converted the recipe to gluten free by using Bob's Red Mill all purpose GF baking mix and 1/8 tsp. xanthan gum instead of the flour.  I typically dislike the BRM baking mix because of its high proportion of bean flours, which have a very strong taste.  I have found in the past that the taste is masked in something that uses a relatively low amount of flour, like brownies, but unfortunately I thought these brownies tasted slightly off because of the bean flour.  I used the BRM flour because I have some in the fridge and am trying to get rid of it in places where I think it won't matter, but next time I'll stick to Jeanne's mix!

Tuesday, March 22, 2011

2011.03.17 - St. Patrick's Day Feast


Although mutts of Irish, English, and probably some other descents, my family solely identifies with being Irish...and not just on St. Patrick's day!  I don't have the red hair of my mom and brother, but I do have the name (Erin).  Of course, when I lived in Ireland, everyone laughed at the name, saying that would be like naming their child "America".

Growing up, our traditional St. Patrick's day food was definitely more Irish-American than Irish.  I think every recipe you read about St. Patrick's day food is prefaced with "well, of course no one in Ireland eats this", so I decided to just stick to what I like instead of searching out the authentic.  I *do* remember throwing a hissy fit on my birthday (which falls near St. Patty's Day) one year because mom made corned beef and cabbage for my Irish Nana instead of what I wanted for my birthday meal (probably pizza).  I have since come around on corned beef.

During my summer in Dublin in 2003, J and I were too poor to eat anything except simple home-cooked meals, an unhealthy amount of ludicrously tasty Crunchy Nut (now available in the US!), and the occasional shawarma.  The most memorable meal (for food quality, value, relaxed-ness, and company quality) we had was at a small bistro in Athlone, a town in the middle of Ireland.  I think that was the first time I ever had risotto.  Yes, I was very sophisticated.

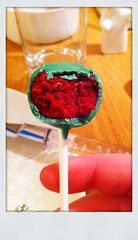
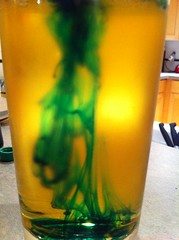
For this auspiciously-timed Thursday dinner, I wanted to make corned beef, but keep it lighter than a boiled corned beef, cabbage, and potato dish.  I thought that the ploughman's lunch sounded like a perfect solution because of the quantity of fresh veggies.  Of course, I also had to make my Nana's Irish Soda Bread recipe.  There was also much experimenting with the green food coloring and various beverages.

Side Note: I am biased, but if you haven't been to Ireland, put it at the top of your vacation list.  There are few places more beautiful than the Ring of Kerry on a sunny summer day.

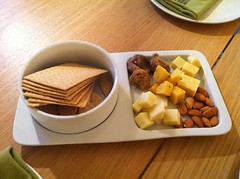
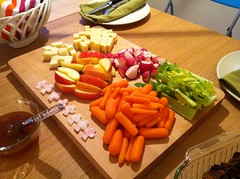
Ploughman's Lunch Platter with deviled eggs and slow-cooked corned beef

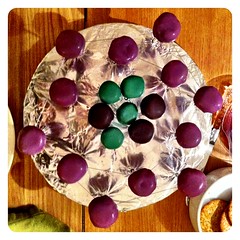
A ploughman's lunch is basically a collection of veggies, cheese, meat, brown bread, and chutney.  I love mix-and-match compartmentalized meals like that.  My veggies were celery sticks, baby carrots, and radishes (some cut out like shamrocks).  I used pre-cut apple slices from Trader Joe's, since I know they don't turn brown when left out for a long time.  The cheeses were: Kerrygold Dubliner cheese, gruyere, a delicious onion and chive gloucester that K brought, and a porter cheese (freaky color!).  Instead of ham, I used corned beef, and instead of soft-boiled eggs, I made deviled eggs because A loves them.  I picked up Major Grey's chutney (a mango-based chutney) from the import aisle.  Next time, I would love to try this with my favorite rhubarb chutney.  Instead of crusty bread or brown bread, I served Irish Soda Bread (below).

I despise deviled eggs, but everyone else seemed to like them :)  The rest was delicious.

Modifications: Since I wasn't serving the corned beef as part of a boiled dish, I left out the veggies mentioned in the recipe and just threw in some celery and onions.  I was surprised that it still tasted great even with water as the cooking liquid (last year I used beer, forgetting it wasn't gluten-free!), but I guess that's what the included pickling spices do for you.  I left out the smoked salmon and roe from the deviled egg recipe.

Gripes: The filling for the deviled eggs was way too mushy.  Next time, I would cut back significantly on the add-ins like lemon juice and sour cream.  One of the few times that an Ina Garten recipe hasn't worked for me.
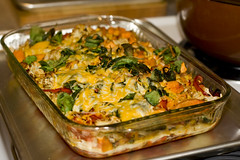
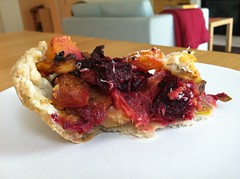
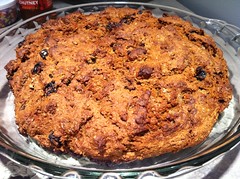
Irish Soda Bread

There are many, many variations on soda bread.  There are the eternal arguments about raisins/currants, caraway seeds, or other add-ins versus authenticity.  Not only does my family's recipe use raisins, but we also take a bigger departure and use molasses.  This produces a sweet soda bread, but one that works equally well for breakfast, dessert, or pairing with cheese and chutney.

Recipe
  • 2 1/4 c. flour
  • 3/4 tsp. baking soda
  • 1 1/2 tsp. baking powder
  • pinch of salt
  • 4 tbs. sugar
  • 3 tbs. unsalted butter, cold, cut in cubes
  • 1 c. raisins
  • 1/2 c. molasses
  • 1/2 c. buttermilk
Preheat oven to 375 F.  Mix together all dry ingredients.  Cut in the butter (using fingers, food processor, or pastry blender) until the butter looks like small peas.  Add in raisins (this coats them in flour and prevents them from sinking during cooking).  Add in molasses and buttermilk.  Mix ingredients and lightly "knead" to form a round loaf.  Bake in a greased pie dish or casserole (8x8) for 40-50 minutes.

Modifications: I made a gluten free version by substituting the flour for Jeanne's gluten free flour mix.  I found that the loaf seemed to "wet" and gummy after over an hour of cooking, so it definitely wasn't quite right.  The work continues.
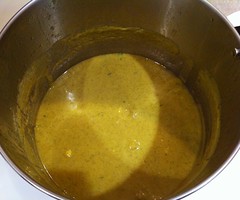
Shamrock Shakes

I love the Shamrock Shake at McDonald's, so I was curious about trying to make my own.  It was a fun experiment, but I think I'll let the experts make it in the future!

Modifications: I scaled up the recipe by a half to increase the servings, and made the servings very small for the health conscious.  I used rainbow sprinkles instead of chocolate, since they are the most fun!

Gripes: I couldn't get this to blend properly, which I think was operator error.  It ended up a little chunky, perhaps more milk was needed?  I thought the texture was a little bad because the chocolate chips from the mint chocolate chip were suspended in the liquid (instead of the smoothness of a shamrock shake).  I don't think they make mint chocolate chip ice cream without the chips though.

Tuesday, March 8, 2011

Wilton Flowers and Cake Design - Lesson #4


This week was the final class for Flowers and Cake Design and my final cake decorating class overall!  I will miss the excuse to play with frosting, but I will enjoy getting my weekends back.

Final class means final cake project.  I liked daffodils the best out of what we learned in the course, so I knew that I wanted them to be the main element of the cake.  I wanted a contrasting purple flower, so I started making violets (but wasn't happy with them) and then switched to making the apple blossom, but with one center dot instead of five dots.  I iced a 6" chocolate cake with white buttercream and brought the pre-made flowers, more buttercream, and green royal icing to class.

Before starting the final cake, we covered doing a basketweave pattern in buttercream.  I wanted to do one on top of my cake, but my buttercream consistency was just not cooperating (it wouldn't stick to my cake).  Once again, the consistency issues plague me!  We also covered the reverse shell border.

I liked the look of the rope border on the class practice sheets, so I decided to do that on my cake.  I then "glued" on my flowers with buttercream and then added the leaves and grass with royal icing.  If I had thought more about it, buttercream would have probably been a better choice for the green accents, but the royal icing was much easier to work with than my poor consistency buttercream anyway.

Overall, I enjoyed this class, but liked it the least out of the three. I don't feel that we went into cake design at all and the flowers are just a little single-purpose for me.  The total investment was eight hours of class time, $22.50 for tuition, and less than $30 in supplies.  The only supplies I needed to buy were the student kit and lesson plan and confectioner's sugar for royal icing.  The rest of the supplies I had already from the Decorating Basics or Gum Paste and Fondant classes.  I see myself using the rope border, the daffodils, and the roses in the future, but I'm not sure what else.

Check out my post about Lesson #3.

Check out my post about Lesson #2.

Check out my post about Lesson #1.

Friday, March 4, 2011

Wilton Gum Paste and Fondant - Lesson #4


This week was the final class in the Gum Paste and Fondant course, which meant cake project time!

During the class, we reviewed making decorative borders out of fondant (eyelets or ruffles) and covering a cake in fondant.  We were then free to decorate our cakes as we saw fit!

I knew that I wanted a green, white, and purple theme to help remind me of spring.  I made a two layer nine-inch chocolate cake (using Martha's one bowl chocolate cupcakes recipe), and coated it with leftover buttercream.  I covered it in white fondant (with only a minor mishap with not having enough fondant to cover the back side, oops!) and put it on the cake board that we made in Lesson #3.

I like the look of woven stripes, so I cut 3/4 inch stripes using the fondant cutter that came in the student kit.  I also made a band of purple to line the bottom of the cake.

I liked the simplicity of the cake at this point, but since the point of the final cake is to be a sampler of what we've learned, I figured I should add some flowers and leaves to it.  I glued on the daisies that we made in Lesson #3 and some leaves that I made at home.  I dried the leaves in the wave flower former tray that came in the Flowers and Cake Design student kit, so I had some that could fit the curve of the cake and some that would poke out.

Overall, I really enjoyed the Gum Paste and Fondant course.  The total investment was eight hours of class time and $130 for tuition ($22.50) and supplies (rest).  I could have brought that price down with better use of the many coupons that Jo-Ann crafts is always sending out.  I look forward to practicing the flowers and techniques for future cakes, and also want to try working with homemade fondant that tastes much better than the commercial stuff!

Check out my post about Lesson #3.

Check out my post about Lesson #2.

Check out my post about Lesson #1.