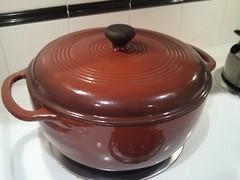
I was down and out with the flu last week, so no Thursday dinner :( This week, I was back with a vengeance and celebrating a Christmas gift, my dutch oven.
For some reason, a stove-to-oven pot like a dutch oven has been missing from my kitchen gear since I've started cooking. I've always been intimidated by the Le Creuset prices and have been too lazy to research the alternatives. With Christmas money in hand and no job to distract me, I finally sat myself down and decided to purchase one once and for all.
The Journey:
- Notice that Sur La Table has a sale on Le Creuset. What!, I say, Sur La Table never has anything on sale!
- Go to the Sur La Table store nearby, and hem and haw for a half hour. Is the 3.5 quart oval big enough? How come the color I want is under a stack of 20 other dutch ovens? Is this actually a good deal?
- Leave SLT defeated, no purchase in hand
- Decide that my first step should be to determine what size I need for a general purpose dutch oven. Internet to the rescue! Remember that Not Martha did a post on this very subject that I bookmarked three years ago. I knew I wanted to use the pot for no-knead bread (4 years too late!) and braising large pieces of meat, so I decide that six quarts would be a good size.
- Pat self on back for not buying the 3.5 quart at SLT. How minuscule that seems!
- Look up the six quart Lodge enameled cast iron pots on Amazon. What cheap prices! What good reviews!
- Place a pot in my Amazon cart. Amazon goes down and I fall asleep before it comes back up
- Go back to Amazon in the morning. The pot in my cart is no longer available. Ahhhhh!
- Calming breath. Look for the Lodge pot again. Find it, but for $30 more than the one I lost.
- Sadly, buy the more expensive pot. But then, on the order complete page, Amazon shows me the same pot in a different color for the cheaper price that never came up in my search. What is going on!?
- Cancel the order, and place a new order for the cheaper pot. End up happily getting a six quart dutch oven in brown, which isn't the cutest color, but is the cheapest well-reviewed pot I can find!
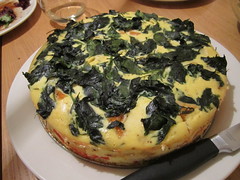
With all the effort it took to get this pot, I figured I needed to make not one, but TWO dishes with it for this Thursday dinner. This led to milk-braised chicken with no-knead bread to sop up the sauce :) And vegetables to be well-rounded and meyer lemon sorbet to end with a light touch.
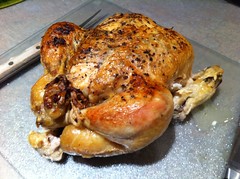
Milk-Braised Chicken
Like everyone that discussed this recipe, I was grossed out, but oddly intrigued, by the sound of cooking a chicken in a pot of milk. Luckily the intrigue won out, because this chicken was super easy and quite delicious. The meat was fall-off-the-bone tender (the easiest chicken I've ever carved) and the sauce was a wonderful lemony/garlicky/salty/silky combination.
Modifications: I used fresh sage since I had it on hand (full stems that I picked out after cooking), a few dashes of cinnamon since I didn't have a cinnamon stick, and a dash of cayenne pepper since I didn't have red chili flakes. I stirred the spices and lemon zest in the milk before pouring the whole thing over the chicken. I tucked the wings and trussed the chicken legs to make it easier to turn the chicken during the browning process.
Gripes: Under the heading "best problem ever", this recipe produced far more sauce than needed for eating the whole chicken. I'm going to roast up some chicken pieces and serve with the leftover sauce.
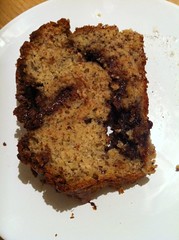
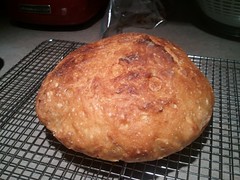
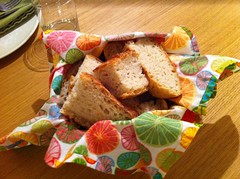
No-Knead Bread
I finally made the bread that took the world by storm...in 2006! Maybe this recipe is retro by now. It has been modified and discussed to death, but I decided to stick mainly to the original recipe to see what it's like before moving on to the many varieties out there. As promised, the crust was amazingly "shardy" and professional-like, the crumb was chewy and delicious.
Modifications: Based on
Mark Bittman's follow-up,
Cook's Illustrated's version, and
Not Martha's recommendations, I increased the amount of salt to 1.75 teaspoons, decreased the amount of water to 1.5 cups, and did the second rise on parchment in a bowl covered with plastic wrap instead of messing around with incredibly sticky dough on floured cloths (obviously Jim Lahey doesn't have to do his own laundry! who wants to clean cloth with dough on it?)
Gripes: I only keep unsalted butter at home, but I wish I had one of those fancy European butters to spread on this!
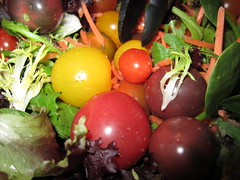
Roasted Winter Vegetables
Another purchase with Christmas money was the Barefoot Contessa box set with Ina's first three cookbooks. I wanted vegetables to go with my meal, and the roasted winter vegetables from
Barefoot Contessa Family Style sounded like an appropriate accompaniment. Roasted veggies are always a winner, so of course these were delicious.
Modifications: I didn't include sweet potatoes.
Gripes: I felt like the butternut squash got a lot softer than the carrots and parsnips in the same cooking time. I don't think I'd cook that combination together again because the squash was slightly too mushy by the time the carrots and parsnips were done.
Meyer Lemon Sorbet
The baked alaska in the blog post sounds delicious, but I only had time/energy to make the sorbet portion of it. I wanted to take advantage of the winter citrus season + end the meal with a light dessert since the chicken and vegetables were so wintery.
Modifications: I halved the recipe. I'm not sure the full recipe would have fit into my ice cream maker!