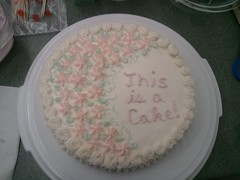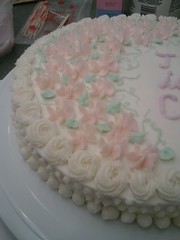


I was still having issues making proper icing roses (homemade icing just doesn't seem stiff enough to practice with) and forgot my flower nail at home, so I decided to have my cake center around the "drop flower". I had some trouble getting the flowers to be more squat rather than tall, I suspect because of icing consistency issues.
For the first time, I really "got" leaves and went nuts making cute little leaves (I added more to the cake after these pictures were taking because I had some time to kill). I tried making some vines with the #1 tip, but the icing would have worked better if it had been thinner with some piping gel.
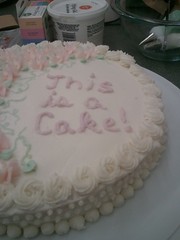
I love the rosette shape, so knew I wanted that to be my border, and decided to polka dot the side of the cake because it wasn't very attractive. Pro tip: don't let your cake sit in the pan for an hour before unmolding. Both of my 9" circles split in half when I tried to unmold and I ended up just having to patch together the least damaged one for this cake.
I knew I wanted to practice writing, but couldn't figure out what to write (I knew this cake wouldn't be eaten because I don't like the taste of the Wilton frosting, so I wasn't making it for a particular occasion), so I went with the obvious :) It is up to the Portal fans to decide if it is lying or not.
I treated the cake as more of a sampler than a proper design, hence some of its over the top nuttiness.
Overall, I enjoyed the course and definitely feel I am able to decorate cakes much more ably now, although nowhere near a professional-looking level. As you would probably expect, the Wilton courses focus a lot on flowers and more traditional and kid-friendly designs -- they seem to be targeting moms who want to make birthday cakes for their kids. In fact, one of my classmates had to bring her daughter to the final class, so they were decorating together and it was adorable. I am more into things like video game cakes and modern designs, but I think that these skills will be easily transferable. And I do adore most designs made with the star tip :)
I would have preferred a faster moving course, but there is something to be said for the nice leisurely pace and it fits better with most of the people who take the class. My overall investment was less than $75, including course registration (8 hours total class time), equipment (that I get to keep), and ingredients for icing, cookies, and cakes.
I look forward to experimenting with icings that can be used for decorating but taste good (the Wilton recipe is gross) and continuing to make cake creations! Stay tuned for posts about the other two Wilton classes I will be taking: Flowers and Cake Design and Gum Paste and Fondant.
Check out my post about Lesson #3.
Check out my post about Lesson #2.
Check out my post about Lesson #1.
No comments:
Post a Comment